Arduino App Lab
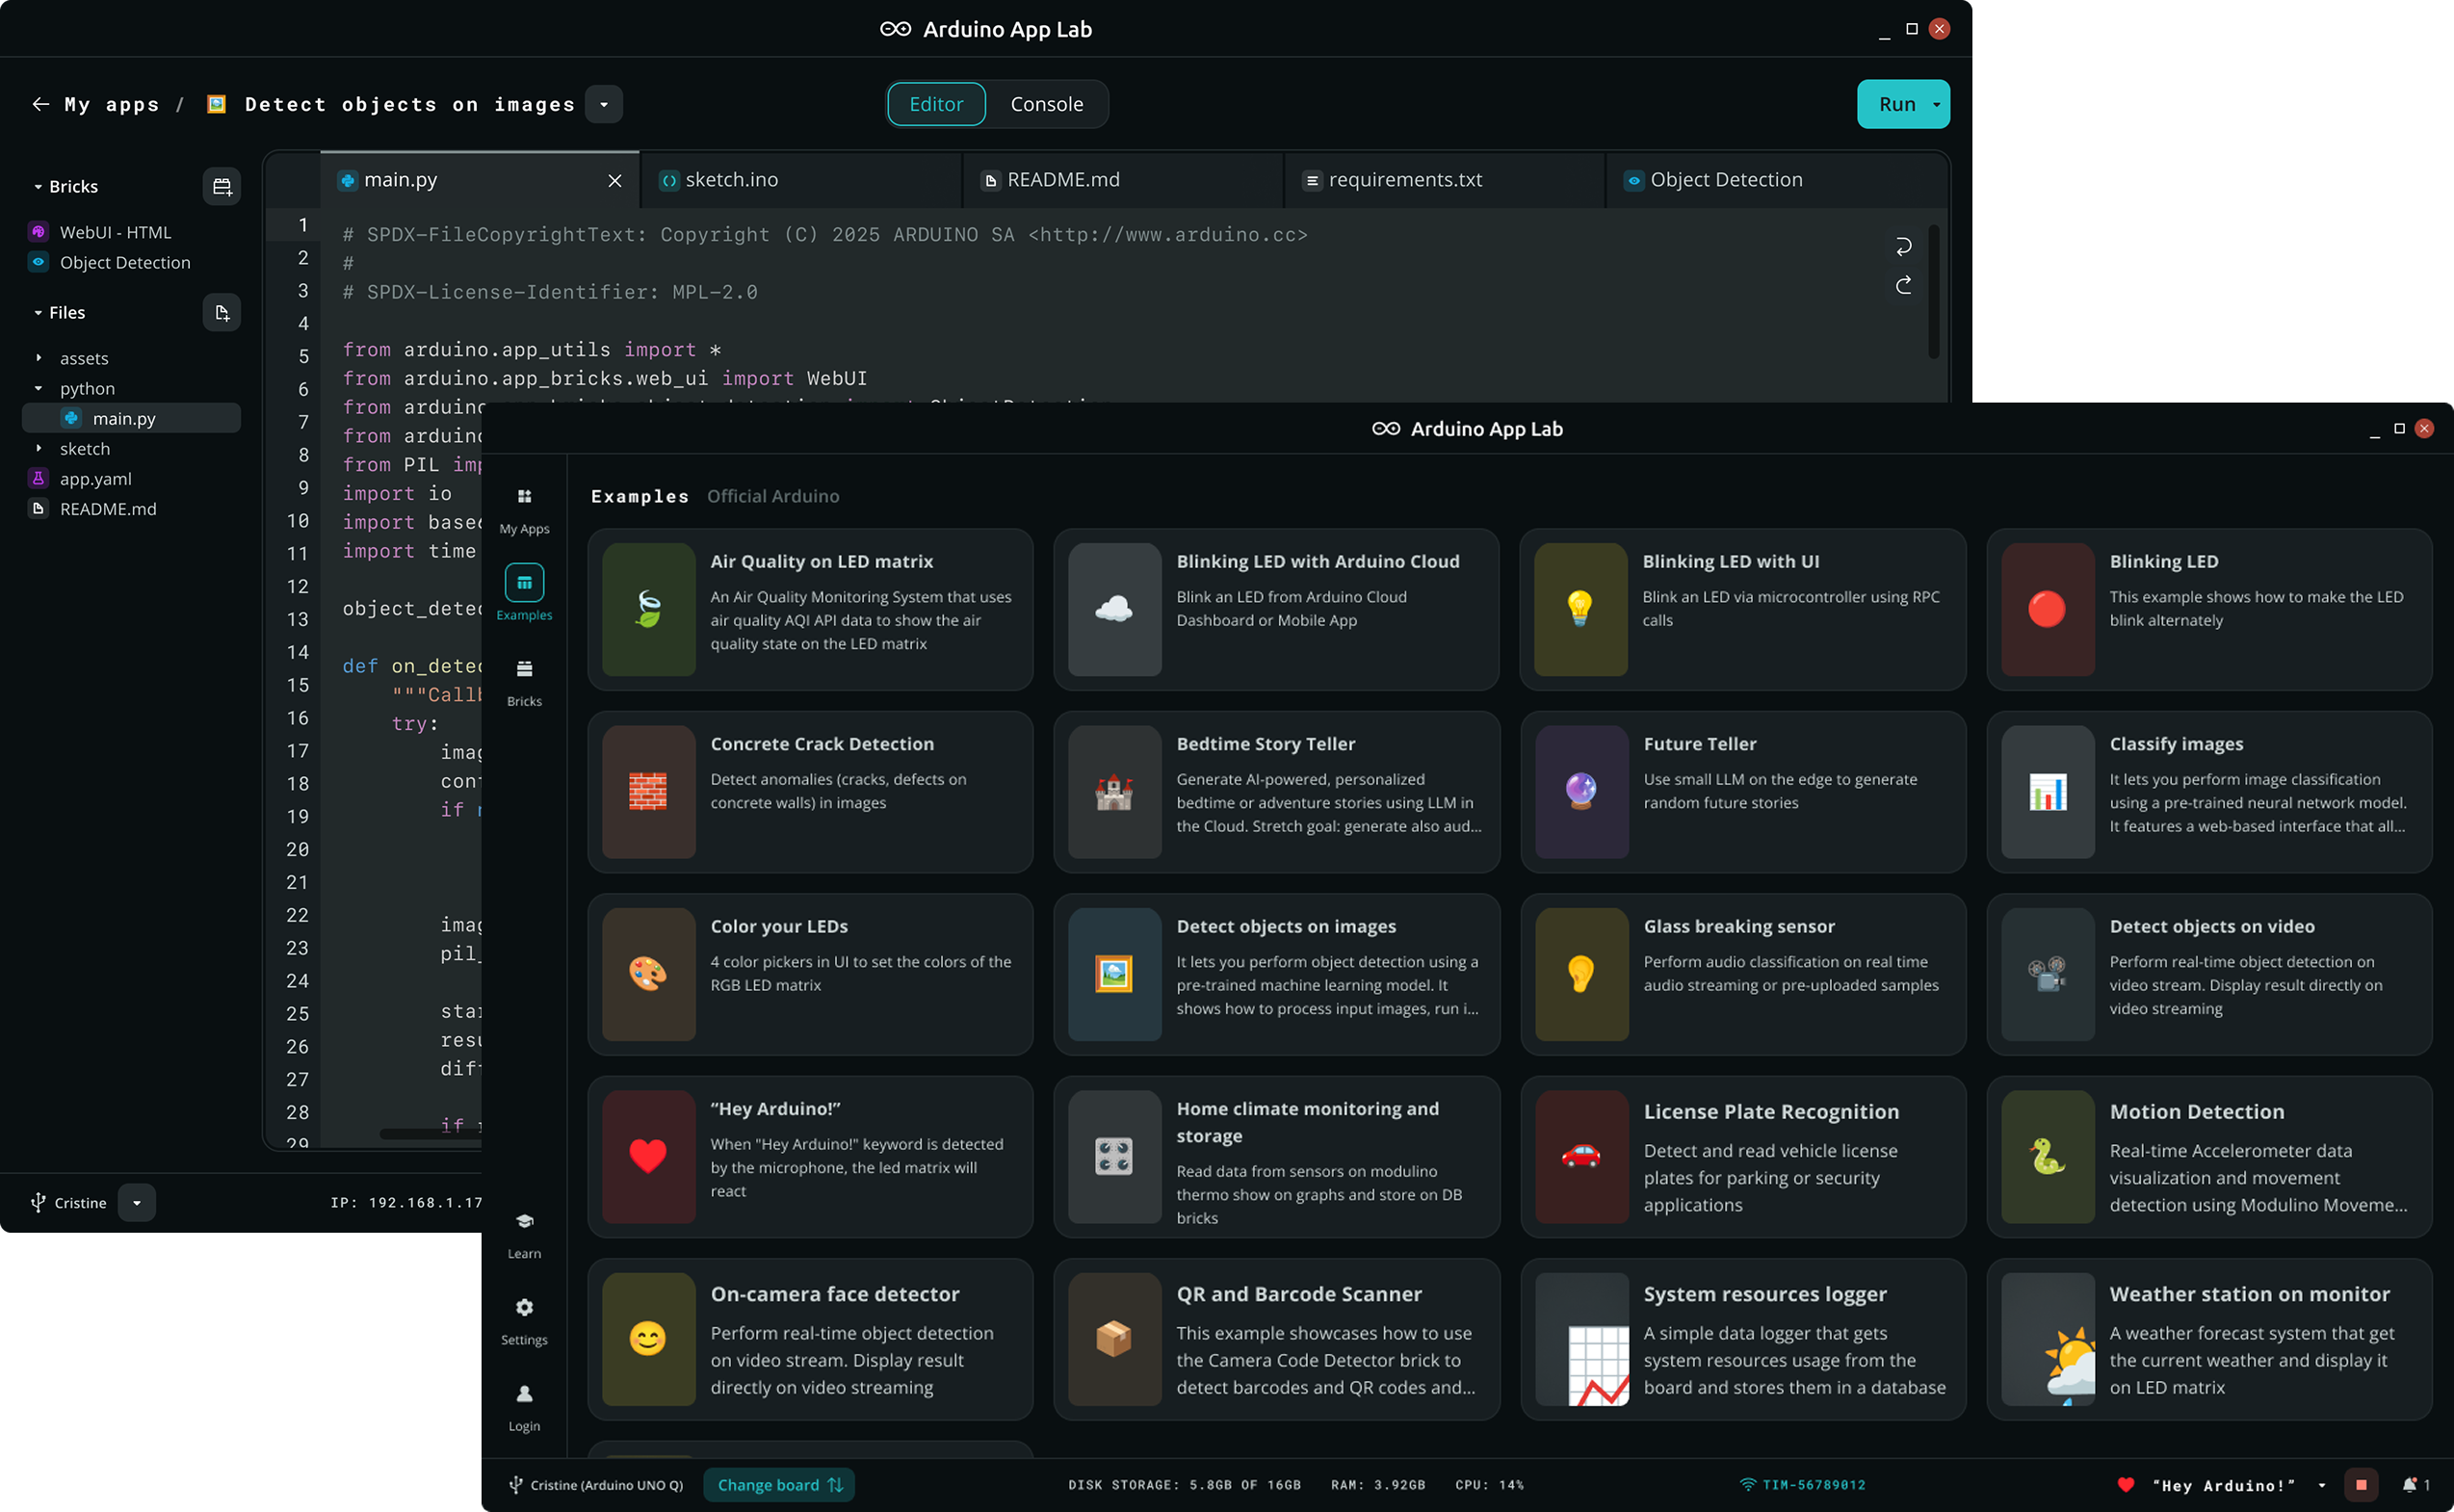
The Arduino App Lab is a unified development environment that extends the classic Arduino experience into the world of high-performance computing. Arduino App Lab lets you seamlessly combine Arduino sketches, Python scripts, and containerized Linux applications into a single workflow.
Arduino App Lab comes pre-installed on the UNO Q and can be used in Single-Board Computer (SBC) mode. We highly recommend the 4 GB of RAM UNO Q variant for a better standalone experience.
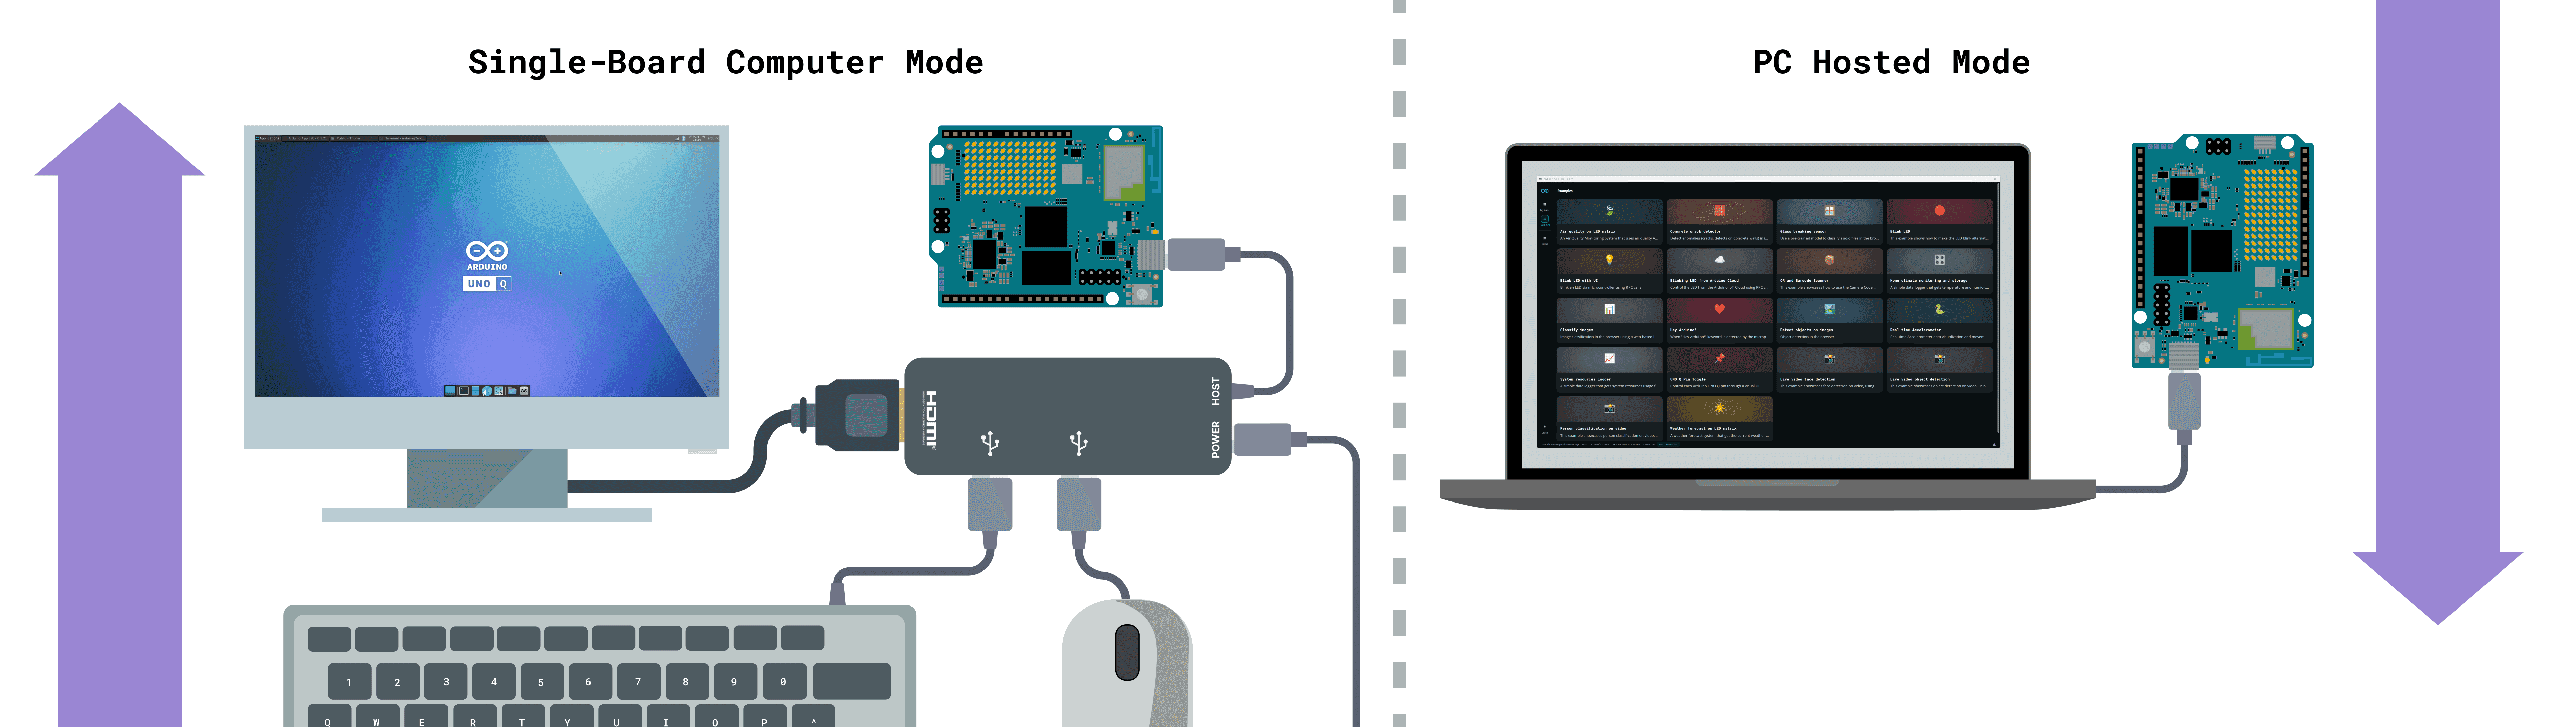
During the bootcamp, we will be using mostly as PC Hosted Mode
Hello World
Let’s program the UNO Q with the classic Hello World example typical of the Arduino ecosystem: the Blink sketch. We will use this example to verify that the board is correctly connected to the Arduino App Lab.
Prerequisites:
- Arduino UNO Q
- USB-C cable
- Computer with internet access
- Connect the UNO Q to your PC
Step 1: Open the Arduino App Lab, it opens in the Examples section.
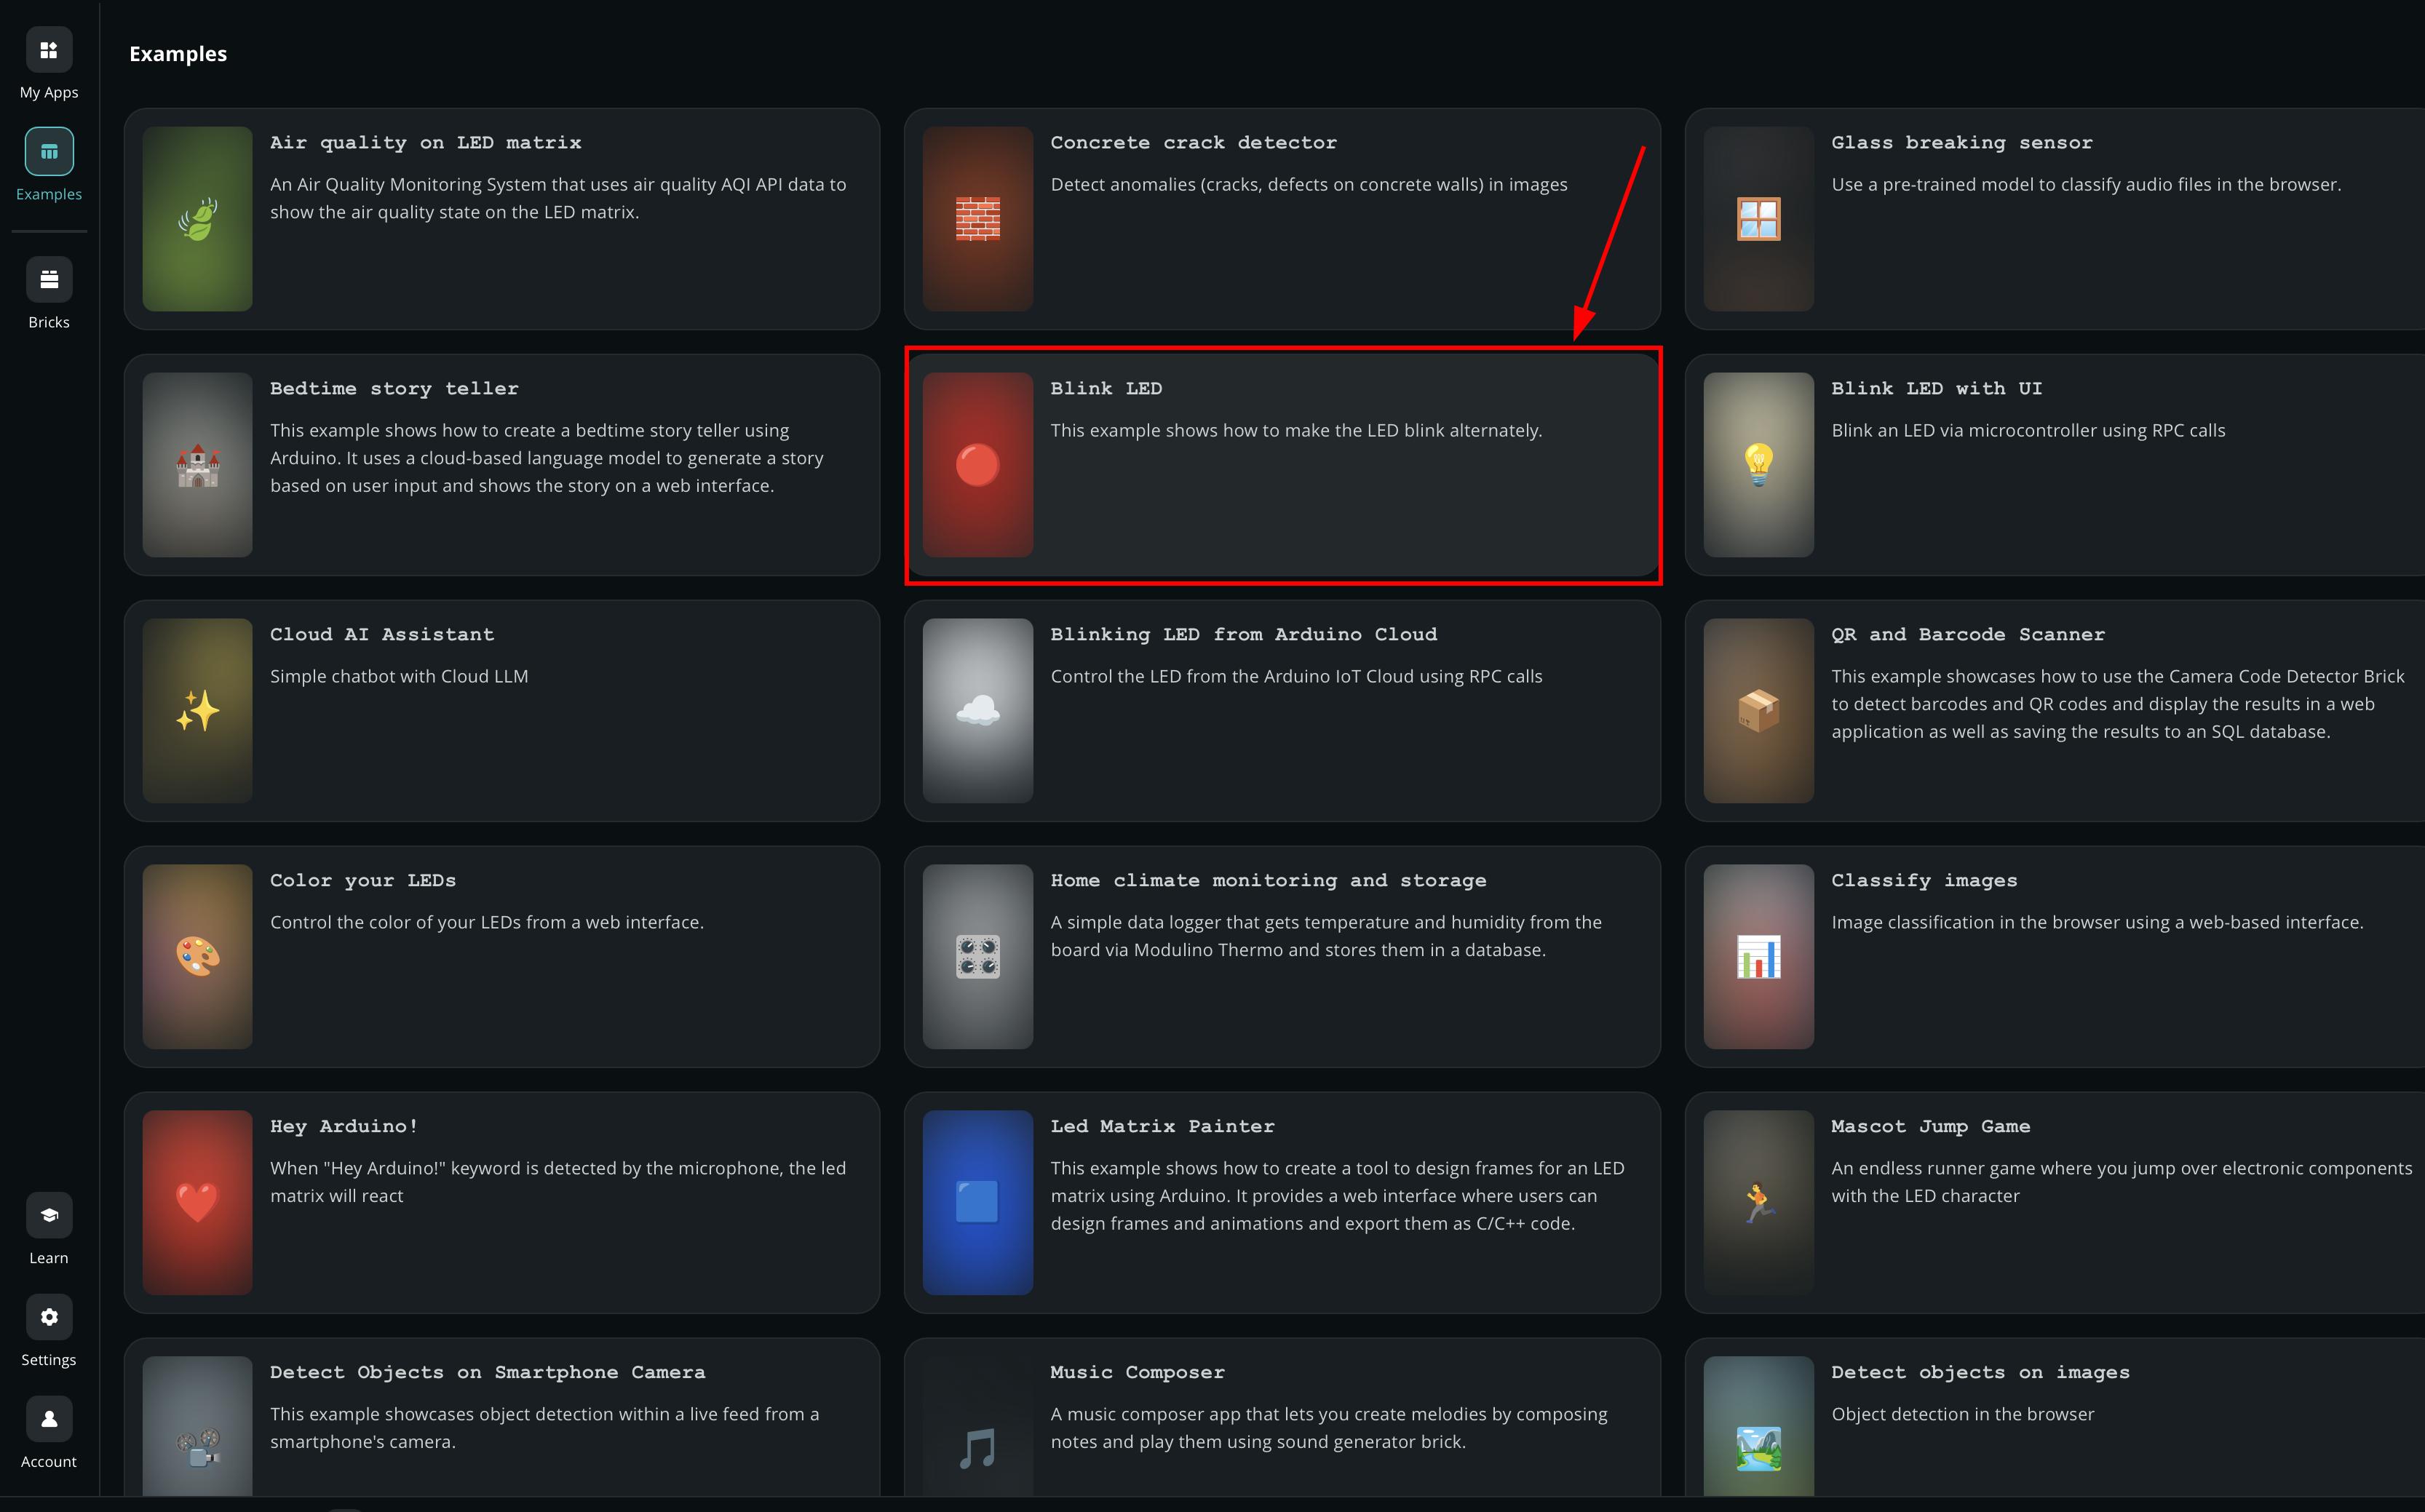
Step 2: Open the Blink LED example
Step 3: Click on the Run button in the top right corner and wait for the app to be uploaded.
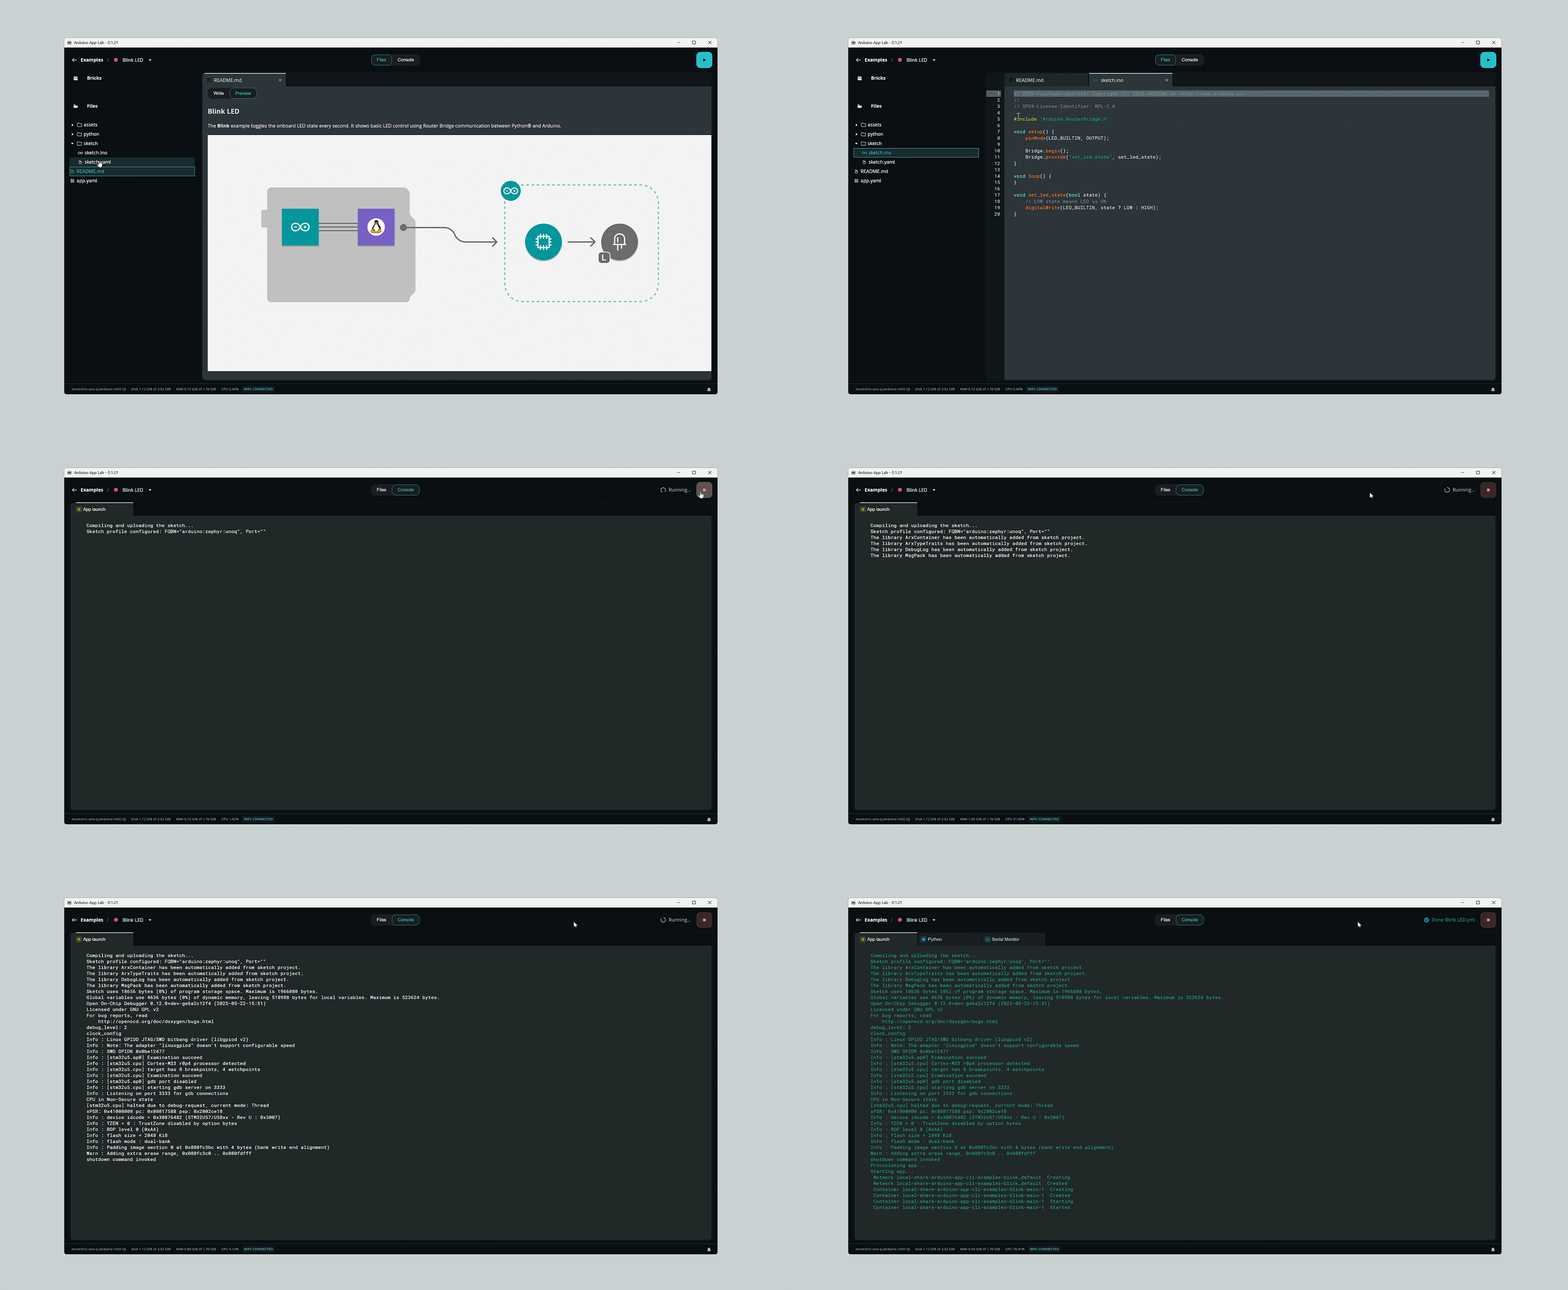
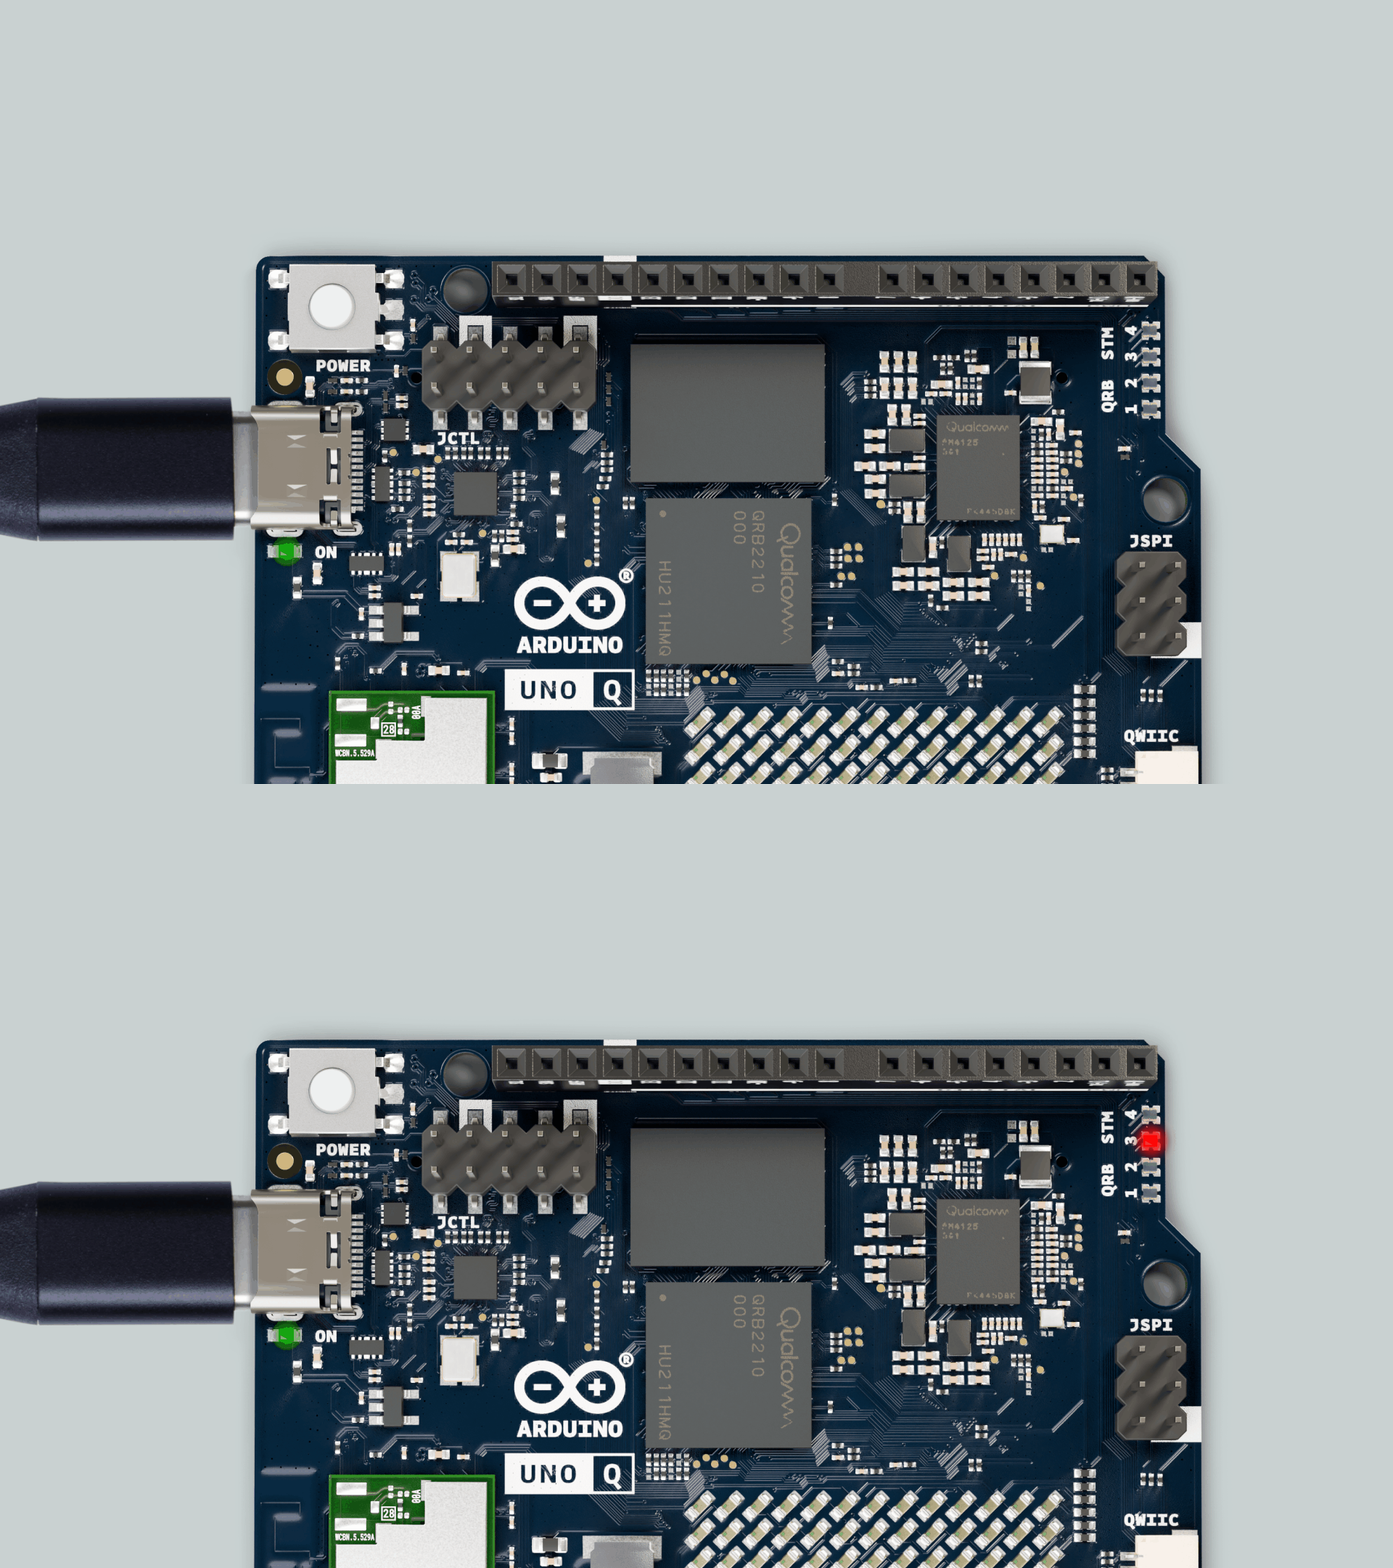
You should now see the red LED of the built-in RGB LED turning on for one second, then off for one second, repeatedly.
Running an App at Startup
You can configure a specific App to launch automatically whenever the UNO Q is powered on. This is useful for standalone projects where the board operates without a computer connection.
You cannot set a built-in Example as the startup app directly from the UI. You must first click Copy and edit app from the example or create a new App from scratch.
- Toggle the Run at startup switch to the ON position.
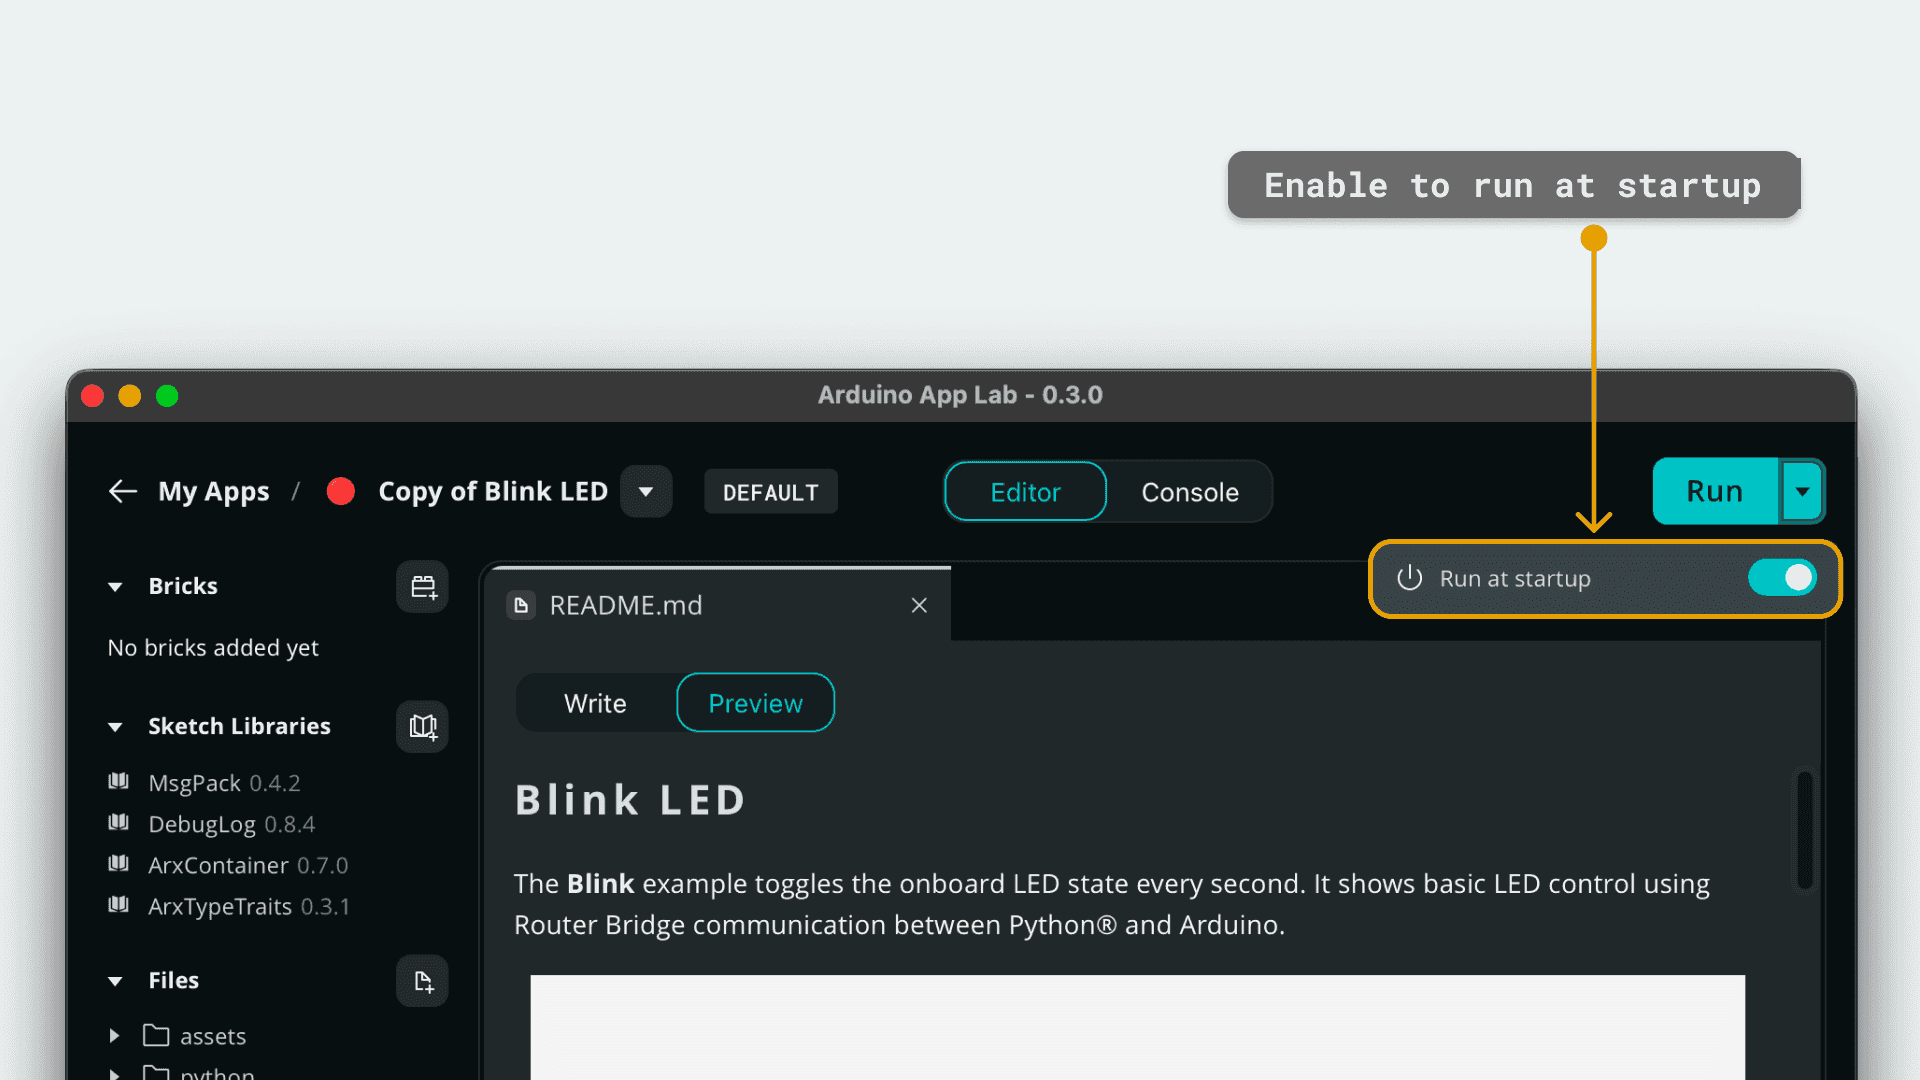
Once configured, a DEFAULT badge will appear next to your App's name, indicating it will run automatically upon boot.
Explore the built-in demos available in the App Lab and experiment with them to get familiar with the environment. Here are a few worth trying:
- Blink LED with UI — control an LED through a simple on-screen interface
- Air Quality on Matrix — visualise sensor data on the board's LED matrix
- UNO Q Pin Toggle — manually toggle digital pins to test your hardware connections
Your Turn
- Connect your UNO Q to your computer using the USB-C cable.
- Open Arduino App Lab and confirm your board is detected.
- Open the Blink example and click Run — verify the red LED blinks on and off every second.
- Click Copy and edit app on the Blink example to create your own editable copy.
- Toggle Run at startup to ON on your copied App and confirm the DEFAULT badge appears.
- Try at least two of the built-in demos listed above and note what each one does.
If the board is not detected, check that you are in PC Hosted Mode and the USB-C cable supports data (not charge-only).